Complex image slides: two real Full-element PPT examples

A slide can combine a dark background, thin borders, a long arrow, and overlapping illustrations. To reuse that design while changing a few lines or moving a picture, you need to select the relevant parts separately.
The two screenshots below are actual Full-element editable PPT results supplied by a user. One uses information cards and an arrow; the other combines layered artwork with text annotations. Both show multiple objects selected, revealing the selection boundaries around text and visual elements. The original Chinese slide content is retained in the screenshots.
2pptx Full-element mode rebuilds recognized text as text boxes, separates suitable visual content into picture objects, and assembles a PPTX. You can then continue editing those objects in the downloaded file.
Upload your slide and choose Full-element
Case 1: text, cards, and an arrow on a dark slide
The first slide has a dense layout: a large heading, labeled fields and body copy, a horizontal yellow arrow, and a green panel containing artwork and explanatory text. Black and yellow decorations run along the outer edges.
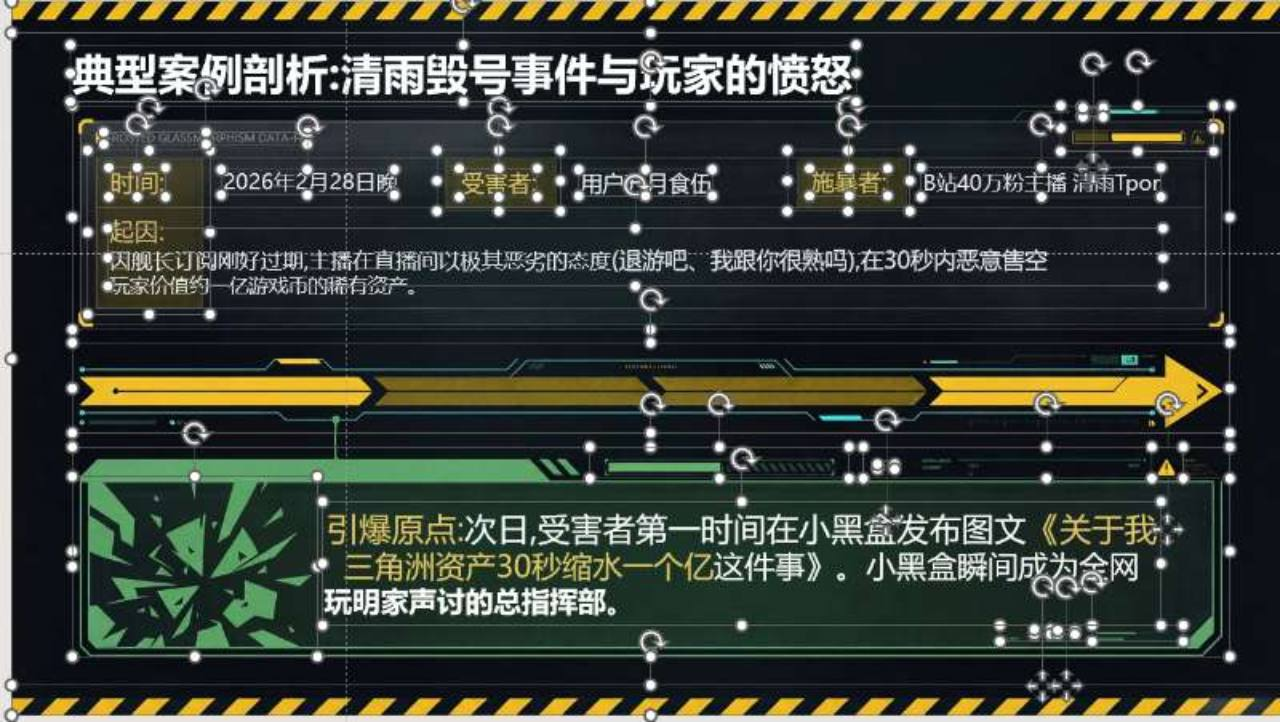
Three areas are useful to examine:
- The heading and field text. The heading has its own outline, while labels such as the date field and their adjacent values show distinct selection areas. These are the places to locate when updating the text.
- The long yellow arrow. Its horizontal region has boundaries separate from the text above and below. Before moving it to make room for copy, check which objects make up the arrow and select them together.
- The green panel at the bottom. Selection boxes appear around the artwork on the left, the copy on the right, and surrounding decoration. This lets you work through the alignment of the picture, text, and panel.
A typical edit would keep the colors and decoration while updating the case description. Change the wording first, then adjust the panel height and spacing to fit the new line count.
Case 2: layered artwork and surrounding annotations
The second slide centers on an isometric illustration: stacked plates support two modules, labels and leader lines sit on either side, and a wide caption bar runs across the bottom.
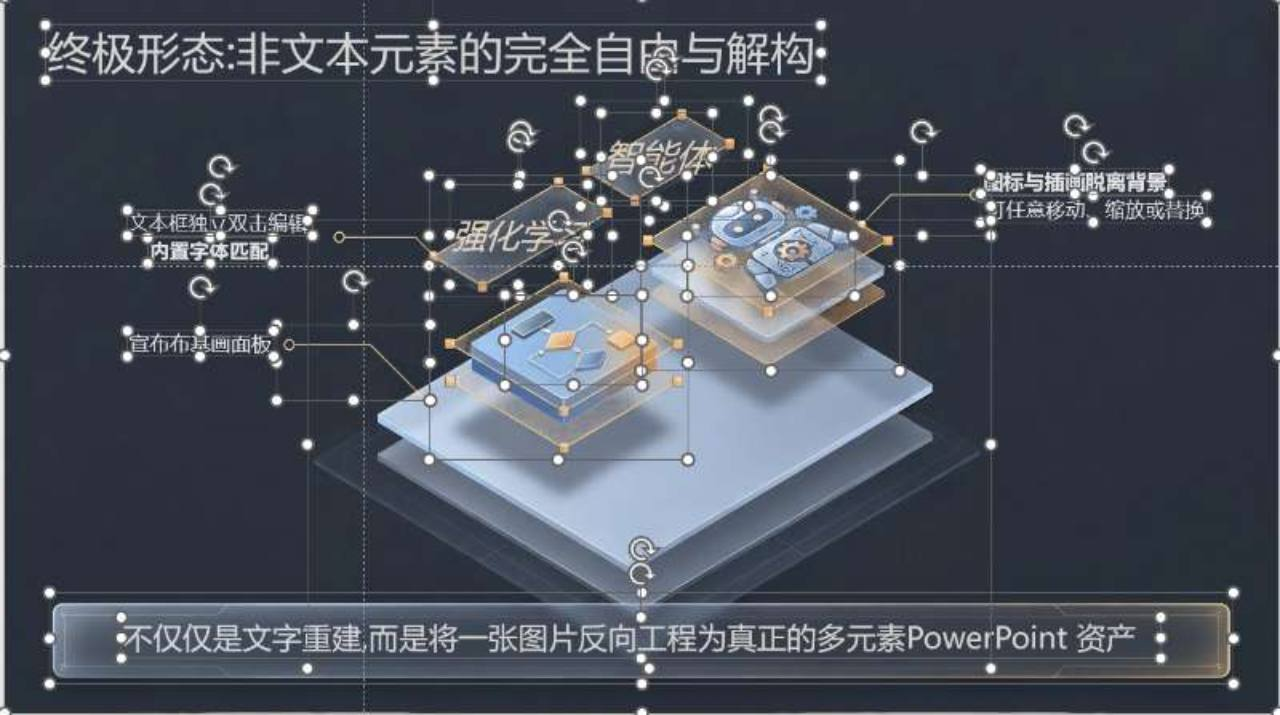
Look at the relationship between the text annotations and the central artwork. The heading, left and right notes, and bottom sentence occupy distinct regions. Multiple outlines also surround the modules and plates, showing the visual separation within the illustration.
To adapt this layout for another technical explanation, start with the heading and side annotations. Then decide whether to move the artwork. Moving a module also calls for checking its leader line, nearby label, and overlap with the layers above and below it.
Layered artwork often includes shadows and translucent edges. To move a whole section, select the parts that belong together and group them. To adjust just one module, leave surrounding objects in place and work through the changes individually.
Try Full-element conversion with your own complex slide
What can you change in the downloaded PPTX?
These examples cover two common tasks: updating copy on an information slide, and changing labels or layout around an illustration. Open the downloaded file in software that supports PPTX editing, then work with the relevant objects:
| Content to change | Action | Check afterward |
|---|---|---|
| Heading, date, or body copy | Edit the wording, size, or color in its text box | Line breaks, box width, and nearby content |
| A separated picture or module | Move, proportionally resize, or replace the picture | Transparent edges, sharpness, and its old position |
| An arrow, border, or decoration | Confirm the selection, then move or delete it | Continuity of nearby lines and remaining space |
| Artwork made of several objects | Select the relevant parts, group, and move them | Stacking order, line endpoints, and labels |
Non-text content in Full-element output is usually stored as transparent pictures. Moving or resizing acts on the whole picture. To change internal lines, gradients, or individual contours, use the original artwork or redraw the relevant part in PowerPoint.
For text changes alone, consider Standard or Premium clean. Choose Full-element when you also need to move or replace pictures. See the conversion mode comparison, or the before-and-after Full-element examples to compare source images with output structure.
Editing a dense layout without losing track of the objects
The white dots, rotation handles, and dashed lines in the screenshots are selection markers. Deselect the objects and use slideshow view when you want to assess the overall design.
- Start with one text edit. Duplicate the slide for comparison. Change a heading or short sentence, check the wording, font, and wrapping, then move on to longer paragraphs.
- Use the selection pane for hard-to-reach objects. Cards and layered artwork can overlap. Move a selected item slightly and undo to see which parts move together. Group the relevant objects when you need to reposition them as a unit.
- Inspect the old position after moving an object. Look for remaining shadows, graphics, or fine lines. Marks in the background image need repair in that area; see background checks after removing an element.
- Finish with alignment. On the information slide, check labels, body copy, and card edges. On the illustration slide, check modules, leader lines, and their annotations. Save a new file, reopen it, and inspect it in slideshow view.
For broader layout changes, follow the slide rearrangement guide. To insert a company logo or product photo, see how to replace pictures in the downloaded PPTX.
Convert your own image slide to Full-element PPT
Prepare a clear PNG/JPG, PDF, or image-based PPTX with one full-slide picture per page. Use the original export where possible to preserve small text, fine lines, and picture edges.
- Go to the upload area, choose Full-element, and upload your file.
- Review the page count, cost, and service details, then follow the prompts to submit. See pricing and packages for current charges and quotas.
- When processing is complete, download the assembled PPTX from the result page.
- Open it and check the text or picture you most need to change before editing the rest of the slide.
A representative page containing text, decoration, and the main artwork will help you assess whether the actual separation suits your next round of edits.